FREE! Click here to Join FunTrivia. Thousands of games, quizzes, and lots more!
Quiz about Neverwinter  Tomb of the Nine Gods

"Neverwinter" - Tomb of the Nine Gods Quiz


Take a journey deep into the jungles of Chult for one of the hardest dungeons the game has to offer in "Neverwinter", for the PS4, XBox One, and PC.

A multiple-choice quiz by cavalier87. Estimated time: 6 mins.
  1. Home
  2. »
  3. Quizzes
  4. »
  5. Video Game Trivia
  6. »
  7. Video Games L-P
  8. »
  9. Neverwinter

Author
cavalier87
Time
6 mins
Type
Multiple Choice
Quiz #
390,963
Updated
Dec 03 21
# Qns
10
Difficulty
Tough
Avg Score
5 / 10
Plays
68
- -
Question 1 of 10
1. One of the game's hardest dungeons, a final rite of passage for characters of all classes, and an ultimate test for the game's diehard players. Because of the insane difficulty Tomb of the Nine Gods, also affectionately known by the community as "T9G" or "TONG", has to offer, it is simply often impossible to run this dungeon successfully through the game's public server. Because of this, it is extremely common for players to attempt to do this with a custom made party, through the game's private server. Other than increased means of communication, there is one other reason to try this dungeon through the private server, and the reason is that players will attempt to tweak what the game recommends for a party to make for what is considered to be a more optimal build for the party. What is the community consensus for the best way to try this dungeon? Hint


Question 2 of 10
2. Checking out the first boss of this dungeon returns us to an old friend. He's back from the dead, and he wants some revenge. You slayed him at the ominous Castle Never, but he's in another world of difficulty to take down this time. Who is the first boss of this dungeon? Hint


Question 3 of 10
3. The second boss, often thought of as the easiest this dungeon has to offer, may be comparatively easier to its comrades, but standalone, is by no means easy to take down. The man behind this machine has taunted you throughout your time in this dungeon, and it's time to destroy his masterwork. What is the name of his machine?

Answer: (Looks like a massive tower)
Question 4 of 10
4. The final boss sure is a fitting challenge. The mastermind behind the feared Death Curse, and the very being Prince Wakanga Otamu fears so much. By slaying this creature, you will forever free the Port Nyanzaru and the jungles of Chult from this curse. Who is the final boss?

Answer: (A Lamia)
Question 5 of 10
5. Other dungeons, such as Fangbreaker Island and Master Spellplague Caverns, have not been proven to be impossible to solo, but are deemed unreasonably difficult to solo, and thus are considered not doable. Tomb of the Nine Gods is surprisingly different than them. Is it possible to solo this dungeon?


Question 6 of 10
6. What will the player be rewarded with upon successfully disarming one of the dungeon's many traps? Hint


Question 7 of 10
7. What is the name of the Module which introduced this dungeon to the game? Hint


Question 8 of 10
8. What campaign task must be completed in order to unlock this dungeon? Hint


Question 9 of 10
9. Exclusive to this dungeon, there is one type of Seal that can be obtained by defeating bosses and disarming traps, that drops randomly. What type of Seal is this? Hint


Question 10 of 10
10. Legendary Mounts of all kinds will be useful in this dungeon. However, there is one mount which truly stands out on this dungeon. Shining it's brightest in the game's hardest dungeon raises its overall value exponentially. What mount is this? Hint


(Optional) Create a Free FunTrivia ID to save the points you are about to earn:

arrow Select a User ID:
arrow Choose a Password:
arrow Your Email:


Quiz Answer Key and Fun Facts
1. One of the game's hardest dungeons, a final rite of passage for characters of all classes, and an ultimate test for the game's diehard players. Because of the insane difficulty Tomb of the Nine Gods, also affectionately known by the community as "T9G" or "TONG", has to offer, it is simply often impossible to run this dungeon successfully through the game's public server. Because of this, it is extremely common for players to attempt to do this with a custom made party, through the game's private server. Other than increased means of communication, there is one other reason to try this dungeon through the private server, and the reason is that players will attempt to tweak what the game recommends for a party to make for what is considered to be a more optimal build for the party. What is the community consensus for the best way to try this dungeon?

Answer: Adding a second Cleric at the expense of a DPS character

Typically, two Devoted Clerics will be called upon to run this dungeon. They aren't both just healers, however, as one Cleric will run their Divine Oracle loadout, while the other will run their Anointed Champion loadout. Typically, the Cleric with the higher Item Level will run the Anointed Champion loadout. The reason that this is considered optimal, as opposed to tradition parties with three DPS characters, is because having the extra bit of healing along with the buffs the Divine Oracle Cleric provides can be the difference between completing the dungeon, or dying off before even reaching the first boss. Thankfully, the Divine Oracle Cleric, by nature, comes packed with a fair degree of Power, so they can also provide offensive support as well. The reason one of the DPS character should gets the boot instead of the Tank is that the Tank is very simply essential to have in order to defeat the bosses on this map. The enemies and bosses on this dungeon will, with extreme ease, overwhelm any party, even those with the best of Clerics, if there is no Tank, or if the Tank is not doing a good enough job.

Finally, it is worth noting that it is never recommended for any serious party to use an Oathbound Paladin here, either as a Tank or a Healer. Simply put, the mantra of "Jack of all trades, master of none" applies very heavily here. The OP cannot Tank effectively enough, nor can they heal effectively enough. For this reason, creating an Oathbound Paladin for this dungeon is very commonly going to prove to be more trouble than its worth.
2. Checking out the first boss of this dungeon returns us to an old friend. He's back from the dead, and he wants some revenge. You slayed him at the ominous Castle Never, but he's in another world of difficulty to take down this time. Who is the first boss of this dungeon?

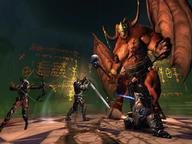
Answer: Orcus

If you thought dealing with Orcus at Castle Never was difficult, then you have no chance of defeating him here. Orcus is often thought of as being the hardest boss on this dungeon, despite being its first. There are multiple differences between Orcus here and Orcus at Castle Never, not just in difficulty, but also in his mechanics. To group them up, I've constructed a list:

Differences:

Orcus no longer summons the Death Sphere, no longer has Rifts he draws power from, and no longer has his terrifying attack where he roars in the sky, and strikes his target with his Wand

Orcus is no longer stationary; he moves very quickly, following whomever his attention is on very closely

When Orcus summons his Shards, they will instantly kill anybody who did not consume the Death Spell upon touching them. The added twist is that, unless it's the person who consumed the Death Spell, they will be killed without the ability to revive themselves, or be revived by others. Orcus will spawn these repeatedly throughout the fight. The person who consumed the Death Spell can absorb these Shards five times without dying. If the Death Spell wears off, they will die upon touching the Shards. However, the person who consumed the Death Spell has the exclusive ability to revive themselves, or be revived by someone else, after dying. As Orcus loses health, he will summon these Shards in greater quantity, and will do so faster. Having good DPS to kill him fast is essential to defeating him.

Orcus now has an Attack that creates massive knockback to anybody getting hit without their shield up, if applicable.

Orcus now summons aggro, unlike before. He does so in terrifying amounts, as the Undead that join him can often come by the dozen, and can be spawned quickly.

Orcus now has a whopping one billion health, a major upgrade from the two hundred million he had at Castle Never.

Similarities:

Orcus' standard attack of bashing his target with his Wand remains the same.

Like at Castle Never, if a player is killed and has to release, they will be unable to re-enter the fight until the entire party is killed off.

Like before, the player will receive Seals of the Protector and Demonic Ichor upon defeating Orcus.
3. The second boss, often thought of as the easiest this dungeon has to offer, may be comparatively easier to its comrades, but standalone, is by no means easy to take down. The man behind this machine has taunted you throughout your time in this dungeon, and it's time to destroy his masterwork. What is the name of his machine?

Answer: Withers Control Machine

As previously stated, this boss is certainly easier to take down than Orcus or the final boss in this dungeon. However, it is not easy to defeat stand alone. The aggro it summons is more suffocating than what Orcus brings to the table. Thankfully, the Machine itself is not particularly daunting.

It's incredibly bulky, but a Guardian Fighter should have little trouble Tanking it, which should afford their teammates more than enough time to deal with the aggro the Machine has summoned. Worth noting is a Cleric with the Soothe feat comes in particularly handy here, as the Machine's primary method of offense comes from Damage-over-Time attacks, such as Noxious Gas.
4. The final boss sure is a fitting challenge. The mastermind behind the feared Death Curse, and the very being Prince Wakanga Otamu fears so much. By slaying this creature, you will forever free the Port Nyanzaru and the jungles of Chult from this curse. Who is the final boss?

Answer: Ras Nsi

Ras Nsi fittingly provides a unique challenge. This is for two reasons. First, the Tank should switch to their DPS build for this fight, as there is little reason to Tank Ras Nsi himself, he generates very little offense by himself. Second, the Tank's assistance will be needed quickly eliminating Soulmongering Witches.

It is within these very Witches that the real challenge comes; Ras Nsi will commonly summon these Witches to fill the Soulmonger meter. Preventing this meter from filling is critical. If it gets full, it kills the entire party and prevents them from reviving themselves, forcing them to start over.

It's not as if Ras Nsi is idle to this fight, as he has two attacks that can kill anybody in one hit, regardless of their Resistances or if they had a Shield up. Of course, he will very commonly force the players away from Soulmongering Witches by targeting their area with these attacks. For this reason, it is important to get in as much damage as possible when the window is open to strike the Witches.

While it may seem like having a Tank divert Ras Nsi's attention away from the Witches' area would be a good idea, this is unfortunately pointless to attempt; Ras Nsi is unique in that he does not respond to the Threat they generate, and will thus continue the attacks uninterrupted.
5. Other dungeons, such as Fangbreaker Island and Master Spellplague Caverns, have not been proven to be impossible to solo, but are deemed unreasonably difficult to solo, and thus are considered not doable. Tomb of the Nine Gods is surprisingly different than them. Is it possible to solo this dungeon?

Answer: No

Unlike the aforementioned dungeons, it is not only unreasonably difficult to solo Tomb of the Nine Gods, but it is literally 100% impossible to do so. Ignoring the difficulty of the dungeon for a second, you cannot even trigger the fight against Orcus without at least three players. Three players are needed to consume the three Spells needed to even begin the fight. One player cannot drink all three spells, rendering it a pointless endeavor to even try this dungeon alone. Even if this was not a hurdle, it would very simply be on the verge of insane to try this dungeon alone. Orcus himself is simply not doable solo, even the greatest players in the world would struggle mightily to even dent his health without dying a violent death to the Undead, Shards, or Orcus himself. Simply put, this dungeon is not child's play; it requires an extremely well put together party, with people who can retain consistent and effective communication.

It requires all five people to be extremely experienced with the game, with optimal builds on their characters, and most importantly, with some free time to spare; this dungeon is neither easy, nor quick to run through.
6. What will the player be rewarded with upon successfully disarming one of the dungeon's many traps?

Answer: Chultan Riches

Forty Chultan Riches will be awarded to each player in the party upon completing a Trap. These Riches are useful for crafting Keys to be used at the end of the Dungeon.
7. What is the name of the Module which introduced this dungeon to the game?

Answer: Tomb of Annihilation

Tomb of Annihilation was introduced to the game on July 7, 2017. It also introduced the Chult Weapon and Armor sets, with the former being a major upgrade for Guardian Fighters and Great Weapon Fighters.
8. What campaign task must be completed in order to unlock this dungeon?

Answer: Blessings of Ubtao

Fittingly, Blessings of Ubtao is the very final Chult task to be completed. However, it is highly recommended that you first complete all the boons this campaign has to offer; a good number of them offer useful Resistances and Damage Bonuses against Dinosaurs, which will be helpful during this dungeon.
9. Exclusive to this dungeon, there is one type of Seal that can be obtained by defeating bosses and disarming traps, that drops randomly. What type of Seal is this?

Answer: Brave

Seals of the Brave are obtained in increments of ten per piece. After obtaining 400 of them, the player can earn themselves amazing Chult gear, such as 480 Item Level Rings.
10. Legendary Mounts of all kinds will be useful in this dungeon. However, there is one mount which truly stands out on this dungeon. Shining it's brightest in the game's hardest dungeon raises its overall value exponentially. What mount is this?

Answer: Commander Tyrannosaur

The Commander Tyrannosaur is absolutely game changing to have. There are a few reasons for this. First, the ability to instantly kill any one minion can be incredibly helpful for dealing with Orcus' and the Withers Control Machine's aggro. If every player in the party has one, they can deplete Orcus' forces by almost half before they even reach the party.

The second crucial reason the Commander Tyrannosaur is so effective is that it grants the player 2,000 Armor Penetration with its Equip Power. In Chult, especially for Guardian Fighters and Great Weapon Fighters, Armor Penetration is extremely useful to have.

This 2,000 bonus is extremely handy for generating Threat, in the Guardian Fighter's case, and for doing sufficient damage, in the case of the Great Weapon Fighter.

The other three on this list are still helpful to have, but they simply don't hold up as well as the Commander Tyrannosaur.
Source: Author cavalier87

This quiz was reviewed by FunTrivia editor kyleisalive before going online.
Any errors found in FunTrivia content are routinely corrected through our feedback system.
4/24/2024, Copyright 2024 FunTrivia, Inc. - Report an Error / Contact Us