FREE! Click here to Join FunTrivia. Thousands of games, quizzes, and lots more!
Quiz about Uncharted Drakes Fortune  The Diary

"Uncharted: Drake's Fortune" - The Diary Quiz


In the PS3 exclusive "Uncharted: Drake's Fortune", the diary of Sir Francis Drake becomes an important tool for solving the puzzles found in the game. What do you know about its function and contents? Good luck!

A multiple-choice quiz by kyleisalive. Estimated time: 3 mins.
  1. Home
  2. »
  3. Quizzes
  4. »
  5. Video Game Trivia
  6. »
  7. Video Games T-Z
  8. »
  9. Uncharted Games

Author
kyleisalive
Time
3 mins
Type
Multiple Choice
Quiz #
360,554
Updated
Dec 03 21
# Qns
10
Difficulty
Average
Avg Score
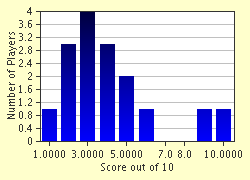
7 / 10
Plays
186
- -
Question 1 of 10
1. Where does Nathan Drake find Sir Francis' diary? Hint


Question 2 of 10
2. The first puzzle indicated by the Diary involves giant braziers. Who lights them? Hint


Question 3 of 10
3. In chapter two, Drake uses the diary to solve a puzzle involving four large symbols. What does this open? Hint


Question 4 of 10
4. When Sully is shot by Gabriel Roman, he's saved by the diary.


Question 5 of 10
5. Which of the following names is not associated with the puzzle in the monastery? Hint


Question 6 of 10
6. Deep in the catacombs of the monastery, Drake will solve a puzzle involving two bells. What does he need to do? Hint


Question 7 of 10
7. Using the book, what can you glean needs to be pulled to open the stained glass window in the monastery? Hint


Question 8 of 10
8. Which symbol, according to the diary, does not need to be shifted to find the hidden passage in the mausoleum? Hint


Question 9 of 10
9. Which of the following Roman numerals does not need to be followed beneath the mausoleum? Hint


Question 10 of 10
10. What button must be pressed on the controller to open the diary? Hint


(Optional) Create a Free FunTrivia ID to save the points you are about to earn:

arrow Select a User ID:
arrow Choose a Password:
arrow Your Email:


Quiz Answer Key and Fun Facts
1. Where does Nathan Drake find Sir Francis' diary?

Answer: Panama

Following the coordinates etched into a ring left behind by notable explorer Sir Francis Drake one day *after* he died, Drake was able to bring to the surface the coffin of his former ancestor off the coast of Panama. Opening it up he found nothing but a lockbox and, inside, Drake's diary.

This is is where the game began. With the diary would come the hope of locating the lost treasures of El Dorado somewhere in the jungles of South America.
2. The first puzzle indicated by the Diary involves giant braziers. Who lights them?

Answer: Sully

While searching the former ruins of El Dorado (after following the map in Drake's diary), Nathan and Sully come across several caverns containing large, unmovable braziers. The only option, of course, is to light them. To do so, however, they need a light. Sully proves his resourcefulness when he uses the matches he brought for his cigars to light the torches.

These actions subsequently open the path for the duo, allowing them to get one step closer to the treasures within...if they're there that is.
3. In chapter two, Drake uses the diary to solve a puzzle involving four large symbols. What does this open?

Answer: A grotto in the floor

The second of two puzzles this early in the game, the signs are fairly straight-forward. Numbered one through four in the diary, all Drake needs to do is push on the stones beneath them in the right order, jumping from sign to sign, to complete the objective and open a hole in the floor.

The hole, when Drake takes the ladder down, will lead to a watery grotto and will take him to a spot where he can let Sully through the other side. After this there are no more Drake puzzles until you reach the monastery.
4. When Sully is shot by Gabriel Roman, he's saved by the diary.

Answer: True

When Gabriel Roman and his men locate Nathan and Sully near the German U-Boat in the Amazon there will be a bit of banter about unpaid debts and the like culminating in a shoot-out. Sully will be shot in the chest while Nathan will flee in the woods (only to find Elena). Later on, when the two of them reach the monastery, Nathan will discover that Sully did, in fact, survive the gunshot, but only because the bullet hit Sir Francis' diary in his breast pocket-- Nathan handed it over before jumping into the U-Boat to prevent it from getting wet.
5. Which of the following names is not associated with the puzzle in the monastery?

Answer: Saul

When Sully hands back the diary in the monastery (after you've cleared out Roman's men, of course) it'll already be time for another puzzle-- this one involving four rotatable statues and a compass. Using the diary you must turn the statues in their respective directions (Matthew/North, Luke/South, John/East, Mark/West) to open a secret passage behind a bookshelf.

Heading deeper into the library here there will be another small puzzle involving torches, but that's nothin'.
6. Deep in the catacombs of the monastery, Drake will solve a puzzle involving two bells. What does he need to do?

Answer: Shoot them both

The diary will insist at this point that "two bells resound in perfect harmony", so it only makes sense to get them to peal at the same time. Since the only things at your disposal are firearms, the way to solve this puzzle is by shooting one and then the other to make a secret door open, leading Drake further underneath the monastery and out the other side.
7. Using the book, what can you glean needs to be pulled to open the stained glass window in the monastery?

Answer: Keys

The diary can be opened again as Nathan makes his way back through the monastery in search of a heart, a symbol used to signify the hidden location of El Dorado's treasure. When he finds it, it's high up on the opposite side of a precarious room. Cue a jumping puzzle. To solve this one, you need to pull down the key levers on each side of the window but jumping and climbing over to them and using your body weight to pull them down.

When both are "unlocked", the window will open and Drake can head inside to find the vault.
8. Which symbol, according to the diary, does not need to be shifted to find the hidden passage in the mausoleum?

Answer: Crown

Entering the mausoleum, Drake will find seven different symbols on placards in the room. Using the diary you must ensure that all of the symbols are correctly oriented. This really only means dealing with three of the seven images. You need to turn the seashell and the arrows all the way around while the snake needs to be flipped onto its side.

When this is completed you'll be able to descend deeper underground into another puzzling series of tunnels. But you'll be used to that by then.
9. Which of the following Roman numerals does not need to be followed beneath the mausoleum?

Answer: IX

The final puzzle solution gleaned from the diary of Sir Francis Drake involves Roman numerals. If you look at the map used by Nathan throughout the game you'll notice three numerals-- II, V, and VII-- scrawled into the top right corner of the page. If you follow those numbers and only those numbers in the caverns beneath the mausoleum you'll end up getting through to what should be the treasure room.

The treasure isn't there, of course, but it's the final major step on the way there. What you will find, however, is much more monstrous.
10. What button must be pressed on the controller to open the diary?

Answer: Select

Although you only have the diary for a certain portion of the game, you can't open it at will to solve puzzles. When prompted, Drake can open the journal when you press the Select button and the book will open to the relevant page of cryptic symbols and instructions.
When the book runs through its uses, Drake will also need to use the map included with it to solve his last puzzle. After this it will retire to Drake's desk where it's seen in later games.
Source: Author kyleisalive

This quiz was reviewed by FunTrivia editor eburge before going online.
Any errors found in FunTrivia content are routinely corrected through our feedback system.

3/28/2024, Copyright 2024 FunTrivia, Inc. - Report an Error / Contact Us